The WHMCS Cloud Server Reseller plugin allows you to resell our Fully Managed Cloud Servers transparently, with discounts ranging from 25% to 40% directly from your WHMCS and with automatic provisioning.
Prerequisites #
You need to sign up for our Cloud Server Reseller Program, and if you are not enrolled yet, you can request your membership from here.
Download the plugin #
- Login to your account at https://manager.remarkablecloud.com
- Got to “Services >> Reseller Area”
- Click on “Settings”
- At the bottom of the page, click on the download icon.

- Unzip the remarkablecloud.zip file that you downloaded
- Using the file manager or your favorite FTP client, upload the directory “modules” to the root of your WHMCS installation
- Now, you will have to configure a new server. To do so, move to ‘System Settings’ → ‘Servers’. Once you are there, press ‘Add New Server’.
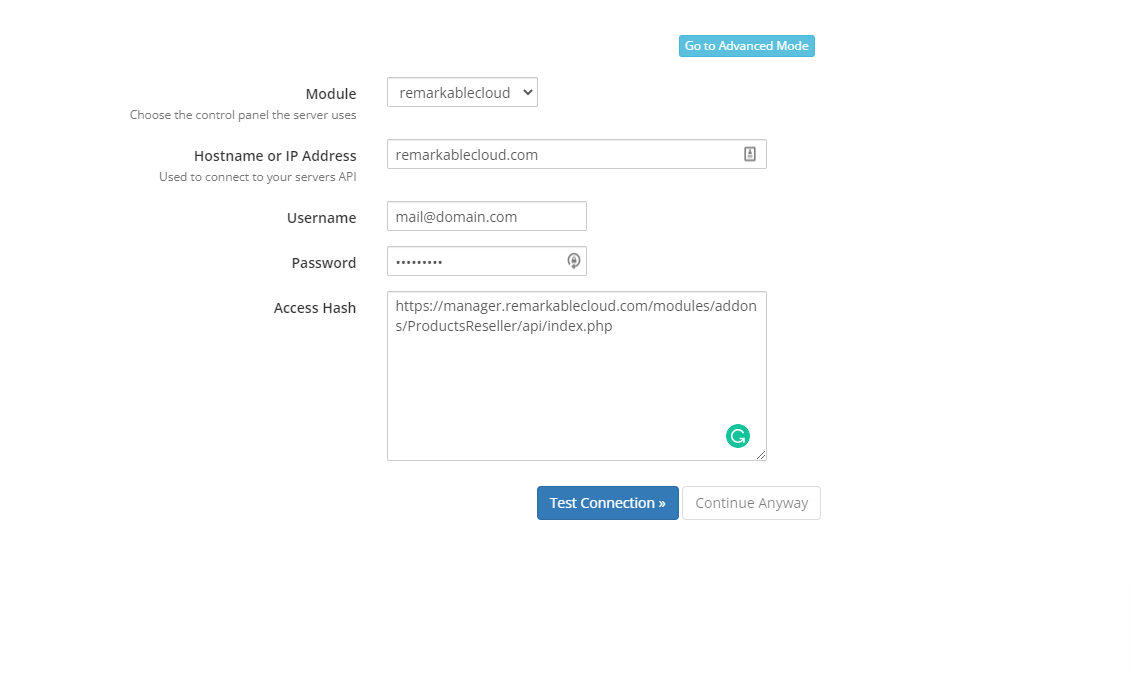
8. Select the module “remarkablecloud”
- Hostname or IP Address: It’s not relevant. You can put whatever you want, like your domain.
- Username: the email address you already have configured in “API Key” (manager.remarkablecloud.com >> Services >> Reseller Area >> Settings)
- Password: The API Key you already have configured in “API Email Address” (manager.remarkablecloud.com >> Services >> Reseller Area >> Settings)
- Access Hash: The API URL located in manager.remarkablecloud.com >> Services >> Reseller Area >> Settings
10. Click on “Test Connection” to check is everything is ok, and Save the Changes.
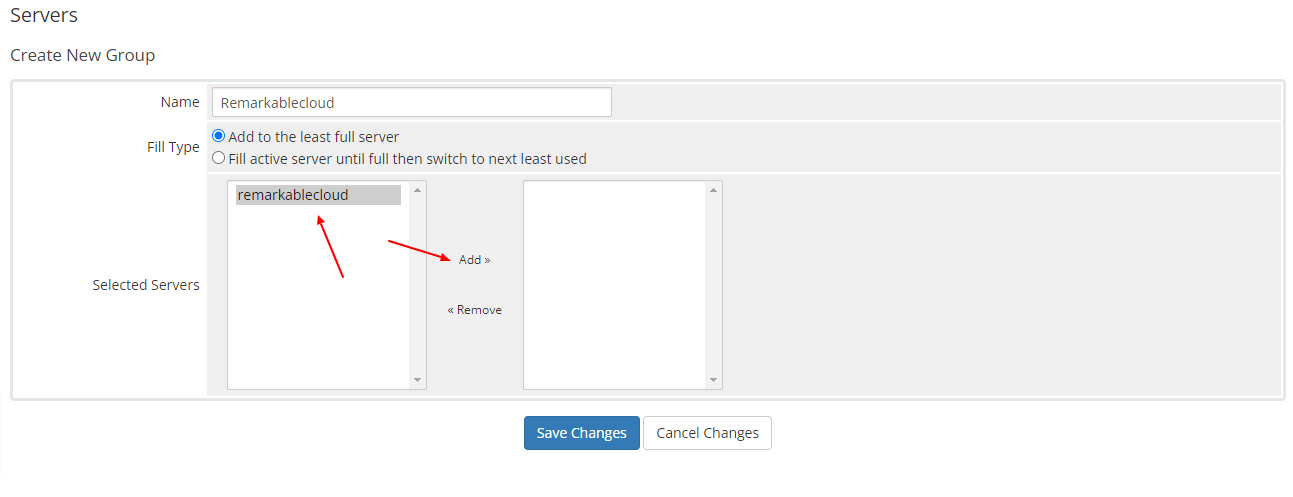
11. Now, let’s create a new Server Group”. To do this, go to “System Settings >> Servers >> Create New Group

Make sure you add the server previously created to your new group by clicking on “Add” and Save Changes
Congratulations
You have setup your reseller plugin successfully, now please continue with our article "How to set up my Cloud Server Products"

